Learn how to make birdseed ornaments! Easy DIY bird feeder ornaments are an easy and useful craft idea for fall, winter, holiday season, Valentine’s and Mother’s Day. Homemade bird treats are perfect to feed garden birds in winter.
And this healthy bird food recipe is a great kid crafts idea and kids activity for school and kindergarten. Add a ribbon and gift tag and you have lovely handmade Christmas gift or sustainable wedding favour.

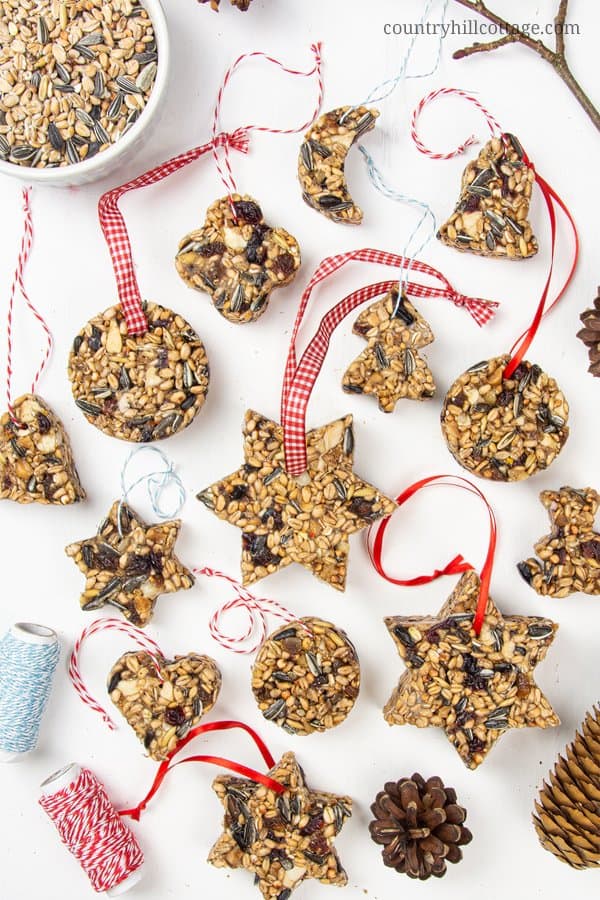
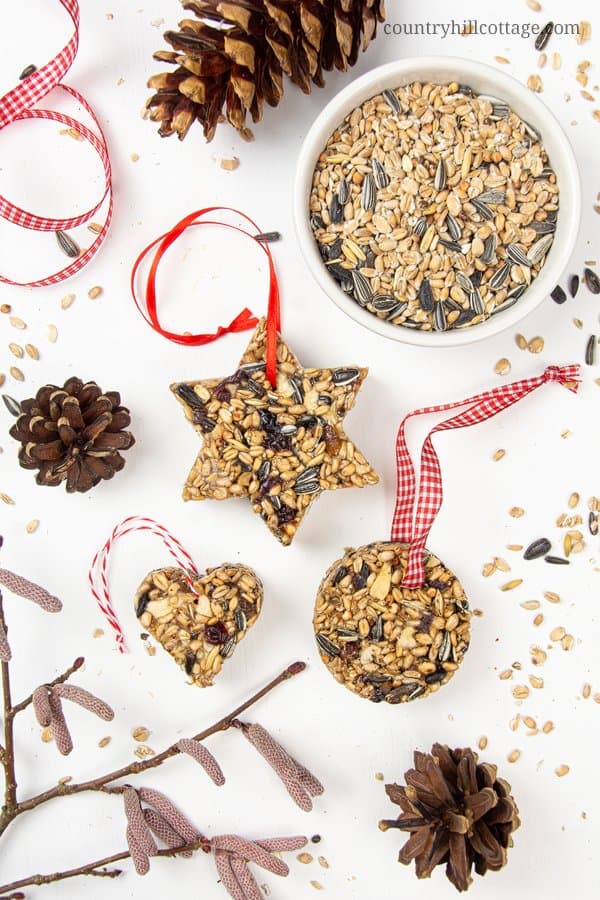
Birdseed ornaments – How to make DIY bird feeder ornaments
Winter is almost here. The air is chilly, the trees in our garden are almost empty and it’s time to make birdseed ornaments. This bird food recipe is very simple to whip up, plus homemade bird seed ornaments look very decorative, too.
Most of us think about feeding garden birds during the winter months, but experts suggest that birds can be fed all year long: “Food can be hard to find at any time of year for a wild bird so giving them an easy meal when they need it can help boost their survival rate.”
Making bird feeders ornaments is also a fun and easy craft idea for kids. My niece Paula turned 3 recently and she loves doing crafts with her auntie. The birdseed ornament recipe is so easy that she could do most of the steps on her own. I just helped with warming the ingredients.
Afterwards, we had the best fun watching the little birdies eating from the ornaments. And for more ideas, try these pinecone bird feeder!
How to make birdseed ornaments – Step-by-Step Tutorial
How do you make a bird seed ornament? From start to finish, you can make DIY birdseed ornaments in about 30 minutes, which makes them great craft project for kids and an easy DIY holiday gifts idea.
Here’s how to make healthy bird seed ornaments:
Prep work
- Line a baking tray/sheet with wax/greaseproof paper.
- Spray the inside of cookie cutters with baking spray. Alternatively, grease with coconut oil.
- Arrange the ornaments on the lined baking sheet/tray.
Note: It isn’t absolutely necessary to grease the cookie cutters. But a thin coat of cooking spray or oil makes it easier to release the birdseed ornaments.
Make the bird feeder ornaments mixture
- Pour the water into a medium-size saucepan and sprinkle with the gelatin.
- Warm over medium heat until the gelatin has dissolved, for about 3 to 5 minutes. Stir continually to avoid burning. Once the gelatin has dissolved, take off the heat.
- Stir in the bird seeds, dried fruit and nuts.
- Stir until the dry ingredients are completely coated in gelatin mixture.
Form the DIY ornaments
- Fill each cookie cutter with bird feeder mixture. Pack and press down tightly until the ornament is full. Pay special attention to the edges and corners.
- Poke a skewer into each ornament to make a hole for the ribbon. Make sure the hole goes all the way through.
Tips: The mixture is sticky, so grease your fingertips with a little coconut oil or cooking spray.
If the mixture cools down too much, re-warm on the stovetop for 1 to 2 minutes, or until the gelatin is liquid again.
Dry and unmould the handmade ornaments
- Let the ornaments dry for a couple of hours or overnight.
- Carefully release the DIY birdseed ornaments from the cookie cutters.
- String with a ribbon or twine for hanging.

How do you get bird seed to stick together?
These natural holiday ornaments are made with bird seeds, dried fruits and nuts. But how do you get bird seed to stick together? All it takes is one simple step: simmer water and a little gelatin and you have a natural “glue” that will hold the ornaments in shape.
Although you may prefer a birdseed ornament recipe without gelatin, gelatin acts like an adhesive and makes the ornaments stick together.
Is gelatin safe for birds?
Is gelatin OK for birds? I didn’t find any information that would suggest that gelatin is bad for birds. Gelatin is a natural product and safe for birds.
I read, however, that corn syrup, a highly-processed sweetener, shouldn’t be fed to birds. Corn syrup consumption isn’t healthy for humans, let alone wild animals. But I’m happy to report that these are birdseed ornaments without corn syrup.
How long do birdseed ornaments last?
Like any food, birdseed ornaments can spoil over time, especially if they’re stored improperly. Store bird feeder ornaments in an airtight container or zip-top back in a dry, cool place, away from moisture and heat.
If stored correctly, birdseed ornaments will last for 4 to 6 months. Always check that older ornaments aren’t spoiled before hanging them outside.

Birdseed Ornaments – How to Make DIY Bird Feeder Ornaments
Learn how to make birdseed ornaments! Easy DIY bird feeder ornaments are an easy and useful craft idea for fall, winter, holiday season, Valentine’s and Mother’s Day. Homemade bird treats are perfect to feed garden birds in winter. And this healthy bird food recipe is a great kid crafts idea and kids activity for school and kindergarten. Add a ribbon and gift tag and you have lovely handmade Christmas gift or sustainable wedding favour.
Materials
- 2 cups / 300 g / 10.5 oz birdseeds* (see note below)
- 1/4 cup / 40 g / 1.4 oz raisins, chopped
- 1/4 cup / 35 g / 1.2 oz dried cranberries, chopped
- 1/4 cup / 30 g / 1 oz peanuts, chopped
- 1/4 cup / 15 g / 0.5 oz dried apples, chopped
- 3/4 cup / 175 ml / 6 fl oz water
- 3 sachets unflavoured gelatin
- cooking spray or coconut oil
Tools
- saucepan
- cooking spoon
- skewer
- cookie cutter
- wax/grease-proof paper
Instructions
- Line a baking tray/sheet with wax/greaseproof paper.
- Spray the inside of cookie cutters with baking spray. Alternatively, grease with coconut oil. A thin coat of cooking spray or oil makes it easier to release the birdseed ornaments.
- Arrange the ornaments on the lined baking sheet/tray.
- Pour the water into a medium-size saucepan and sprinkle with the gelatin.
- Warm over medium heat until the gelatin has dissolved, for about 3 to 5 minutes. Stir continually to avoid burning. Once the gelatin has dissolved, take off the heat.
- Stir in the bird seeds, dried fruit and nuts.
- Mix until the dry ingredients are completely coated in gelatin mixture.
- Fill each ornament with bird feeder mixture. Pack and press down tightly until the ornament is full. Tips: The mixture is sticky, so grease your fingertips with a little coconut oil or cooking spray. If the mixture cools down too much, re-warm on the stovetop for 1 to 2 minutes, or until the gelatin is liquid again.
- Poke a skewer into each ornament to make a hole for the ribbon.
- Let the ornaments dry for a couple of hours or overnight.
- Carefully press the DIY birdseed ornaments out of the cookie cutters.
- String with a ribbon or twine for hanging.
Notes
*Bird feeder ornaments ingredients
Instead of using 2 cups bird seeds and 1 cup dried fruits and nuts, you can also skip the dried fruit and prepare this bird food recipe with 3 cups / 450 g / 16 oz bird seeds.
Storage and shelf life
Like any food, birdseed ornaments can spoil over time, especially if they’re stored improperly. Store bird feeder ornaments in an airtight container or zip-top back in a dry, cool place, away from moisture and heat.
If stored correctly, birdseed ornaments will last for 4 to 6 months. Always check that older ornaments aren’t spoiled before hanging them outside.
Over to you!
Thanks so much for visiting Country Hill Cottage – we’re so happy you’re here! Have some feedback you’d like to share? Leave a note in the comment section below!
If you enjoyed this post, please share it using the social media buttons you see below the post.
For more crafts, beauty DIYs and recipe, follow us on Pinterest, Instagram, and Facebook.
Cyna xo


Zena
Sunday 19th of December 2021
Hi. I have just a quick question. Should these be almost hard. Mine seem very crumbly and not going hard.
Many thanks
Cyna I Country Hill Cottage
Sunday 19th of December 2021
Hi Zena! Sorry you have an issue. Yes, the should be hard and maintain their shape. If they aren't holding together, the gelatin doesn't seem to be working properly.
Be sure to check the manufacturer's instructions how to prepare the gelatin and maybe double the amount.
To save the batch your already made, crumble the ornaments into smaller pieces and mix them with fresh gelatin.
I hope this helps and please let me know how it goes!
Joy
Monday 22nd of November 2021
Love this idea, might try it when it gets a little colder outside. We love feeding the birds.
Cyna | Country Hill Cottage
Tuesday 23rd of November 2021
I hope you enjoy this project, Joy!
Dianne Hanley
Monday 24th of May 2021
Good afternoon, I was making these ornaments as gifts and decided to shrink wrap them. It made it easier to deliver them to family and friends. It seemed like a good idea but it is summer here and they went moldy in a very short time. Any suggestions for a summer seed recipe that would hold up to some heat and shrink wrap or should I not shrink wrap at all. Thank you Dianne
Cyna | Country Hill Cottage
Monday 24th of May 2021
Hi Dianne! I'm sorry that this happened.
How long did you allow the ornaments to air dry before packaging? And do you live in an area with high humidity?
Mold happens if there's moisture present. So it could be that the ornaments weren't dried thoroughly. Even if the outside seems dry, there could still be moisture inside of the ornaments.
Try this: Put the birdseed ornaments on a cookie rack for air circulation and let them dry for a couple of days, ideally in a dry location. You can also place them in front of a dehumidifier if you have one to help the drying process.
I've made these ornaments a couple of times. They always turned out pretty sturdy and held up well in moderate heat. My cousin made them as wedding favors and had no issues on her 96 F wedding day.
I hope this helps and please reach out any time in case you have another question!
Denise
Sunday 21st of March 2021
I plan to make about 50 . I don't have a lot of cutters. Can you press them out and let them dry without being inside the cutter? - Denise
Trish
Saturday 8th of January 2022
Would it be possible to use silicone molds for these or does the single cookie cutter work best? I’m wanting to make these for a bridal shower favor.
Cyna | Country Hill Cottage
Monday 22nd of March 2021
Hi Denise! I think the mixture is too soft and won't hold its shape if you try to release them immediately. It might be best to work in batches. Make 1 batch of mixture fill the cutters you have. Put them on a tray or baking sheet and put them in the fridge until the ornaments are hard enough to keep their shape (check after 30 min - 1 hr). I hope this helps and happy making!
Ellen
Thursday 7th of January 2021
How do you dry these properly so you can store them in a airtight container
Cyna | Country Hill Cottage
Friday 8th of January 2021
Hi Ellen! I simply let them sit on the counter overnight and they were dry and hardened by the next morning. If you live in an area with high humidity, it may take a little longer than.