
Floral DIY Bath Creamers with Essential Oils

This post may contain affiliate links. Full Disclosure
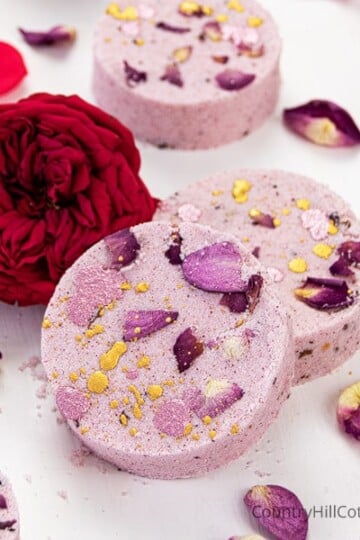
Add luxury to your bath time with floral DIY bath creamers! Homemade bath creamers are a mix of fizzy bath bombs and nourishing bath melts. The natural ingredients for these handmade beauty products include moisturizing shea and cocoa butter, milk powder, and fragrant essential oils. The bath creamers are also studded with dried flowers and petals.

DIY bath creamers
If you have ever looked for ways to moisturize and care for your skin, throw a handful of a bath creamer into your bath. They dissolve in a fun fizz and enrich the water with soothing and nourishing ingredients that cater to your skin needs.
The bath creamers release a lovely floral fragrance, allowing you to pamper yourself and enjoy a wonderful spa-at-home experience. They are also a thoughtful homemade gift for everyone interested in natural skincare.

What are bath creamers?
I’m not sure if anyone outside the UK has ever heard of bath creamers. If you have, drop me a comment and let me know. In Britain a couple of companies offer them, but you can easily make your own DIY bath creamers at home. Think of bath creamers as a “hybrid” between bath bombs and bath melts.
They have the creamy texture and skin-nourishing oils of bath melts but fizz like bath bombs when put in the tub, albeit a bit slower. Bath creamers are usually relatively small-sized, much smaller than traditional bath bombs, and I tend to add a couple of them to my bath water.
What ingredients do I need to make DIY bath creamers?
Floral DIY bath creamers are an all-natural homemade beauty product. Before making the recipes, let’s take a moment to talk about the ingredients and their skincare benefits.
Vegetable butters
Cocoa butter and shea butter will make the bath water feel silky smooth and luxurious. Both kinds of butter contain many natural vitamins and fatty acids that provide nourishment and moisture for the skin.
Cocoa butter is rich in antioxidants and an excellent emollient, meaning it helps the skin absorb moisture. Furthermore, shea butter has anti-inflammatory properties that help to reduce skin inflammation, prevents drying, and softens the skin.
Milk powder
I enriched the bath creamers with goat’s milk powder, which is packed with vitamins, particularly vitamins D and A, some of the most important vitamins for the skin, and nourishing minerals.
This powder also contains linoleic acid, which supports the skin structure, and other essential fatty acids that are very moisturizing and help to even out the skin tone.
You can also use whole milk powder instead. And in case you prefer to make this DIY beauty recipe vegan, replace the sheep or goat milk powder with the same amount of coconut milk powder.

Baking soda, SLSA & cornflour
Other ingredients include baking soda and a small amount of SLSA, which add to the fizziness, as well as cornstarch (cornflour), which helps with the texture of the creamers. If you wish to make the recipe without SLSA, just replace it with the same amount of soda.

Essential oils
Essentials oils are an excellent way to fragrance the bath creamers naturally. You can use any essentials that are skin-safe. I wanted something fresh and floral smelling and used a blend of grapefruit, mandarin red, and ylang-ylang.
Grapefruit essential oil tones and cleanses the skin and hair and smells wonderfully fruity and energising.
Mandarin red essential oil has a refreshing yet calming fragrance and is good to tone oily, acne prone skin.
Ylang-ylang essential oil gives a floral and uplifting scent and perfectly rounds out the citrus scents of the other oils. Since the creamers are so small, the scent throw isn’t overpowering but still pleasant.

Dried flower petals
I rolled the bath creamers in dried flower petals because it looks gorgeous and the petals will steep in the bath water and add even more benefits to your bath time. Just note that the petals don’t dissolve in the bath water. But that’s really the only clean up required with this product, and they wipe away easily with a paper towel.
I didn’t add any micas or color to the DIY bath creamers. The bath water will simply look milky and smell oh-so-good. I plan to make more bath creamers in the future and look forward to experimenting with color.

Tips for making DIY bath creamers
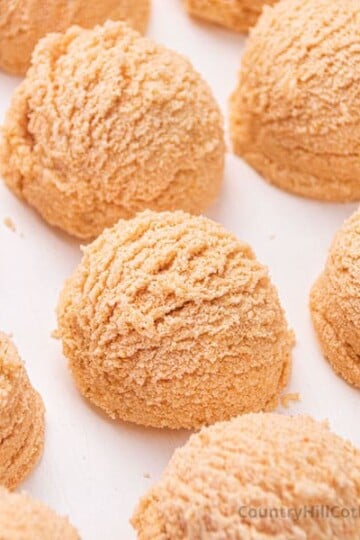
If you have ever made bath bombs you know that the bath bomb mixture should feel like damp sand. In comparison, the bath creamer mixture should have the consistency of cookie dough.
Looking at the ingredients list, you can see that I wrote 150 to 200 g (5.3 – 7 oz) cocoa butter. I recommend to start with 150 g (5.3 oz) and increase the amount of cocoa butter only if the mixture is too dry to roll balls.
On the other hand, when the mixture is too soft add soda and cornstarch, a spoonful at a time, until it maintains its shape. You can also gently warm the mixture in the water bath should it become too firm to form creamers.
For gift giving, I put the bath creamers into jars that I decorated with a piece of ribbon and a printable label.

DIY Bath Creamers Recipe
Add luxury to your bath time with floral DIY bath creamers! Homemade bath creamers are a mix of fizzy bath bombs and nourishing bath melts. The natural ingredients for these handmade beauty products include moisturizing shea and cocoa butter, milk powder, and fragrant essential oils. The mini bath bombs are also studded with dried flowers and petals.
Materials
- 1 cup – 1 ⅓ cups (melted) / 150 – 200 g / 5.3 – 7 oz cocoa butter
- ⅓ cup (melted) / 50 g / 1.7 oz shea butter
- 2 ½ cups / 600 g / 21.2 oz baking soda
- 1 ½ cups / 200 g / 7 oz goat’s milk powder
- ½ cup / 60 g / 2.1 oz cornstarch (cornflour)
- 3 tbsp / 20 g / 0.7 oz SLSA (Sodium Lauryl Sulfocetate)
- 200 drops / 10 g / 0.35 oz grapefruit essential oil
- 100 drops / 5 g / 0.17 oz mandarin red essential oil
- 25 drops / 2 g / 0.02 oz ylang-ylang essential oil
- dried petals mix
Instructions
- Melt the butters. Add the cocoa and shea butter to a heat-resistant bowl and melt in a water bath over a low flame. Once completely melted, take off the heat and let sit for 10 minutes. Then stir in the essential oils.
- Mix the dry ingredients. Put on the mouth cover and gloves. Weight out the dry ingredients and put them into a mixing bowl. Combine until no lumps are showing.
- Make the bath creamer mixture. Pour the melted butter-essential oil mixture over the dry ingredients and knead well to combine.
- Form and chill the bath creamers. Form 3 cm (1.2 in) balls from the mixture and then roll in dried flower petals. Place the bath creamers on a lined plate or tray and let firm up in the refrigerator or freezer for one hour.
Notes
Instead of covering the creamers with mixed petals, you can also decorate them with a single type of flower (e.g. dried rose petals, lavender, cornflowers, or calendula petals).
I also recommend to use a digital kitchen scale for measuring our the ingredients so you can prepare the beauty recipe with precise measurements.
How to use the DIY bath creamers
Drop the bath creamers into a warm bath, and they will fizz softly, releasing its moisturizing butters and fragrant essential oils into the water. Apply body lotion or body butter after the bath.
Storage and shelf life
The DYI bath creamers can be stored in an airtight container in a cool, dark place for up to a year.


Printable Bath Creamer Label & Gift Tags
Tab on the button to download your free printable bath creamer label to package and gift your beauty DIY beautifully!
Hi Nichole! Yes, I think you can use bentonite clay instead of cornstarch. Clay is more absorbent than cornstarch. So, in case you notice that the creamers are too dry to be shaped into rounds, you may have to add 1 to 2 tbsp cocoa butter. Let me know how it goes and happy making!
Hello, I have bentonite clay. Would that work as a substitute instead of cornstarch? Thank you.
Hello, I have bentonite clay. Would that work as a substitute instead of cornstarch? Thank you.
I just asked this question, oops. Thank you for answering.
Hi there! I was wondering about how many do you get from one batch. Thank you, they look lovely. I want to make these for bridal shower gifts.
HI,
I have a Skincare and Health Salon in South Africa. I am also an Aromatherapist. These are so soothing on the skin. I will add a little extra essential oil next time as I feel they need to be a little more fragrant. They look too beautiful with the dried petals around them. Thank you for sharing.
Yes, you can do that!
Thank you, Toya! I haven't use citric acid instead of SLSA, but it should work fine. If you try it let me know how it goes!
Instead of the cornstarch can you substitute clay?
Love this. I have never heard of them an can not wait to experiment. Instead of the SLSa can I use citric acid?
Thank you so much, Therese! You hope you will enjoy this recipe and let me know how your bath melts turn out.
Hi,
I am a Beauty Therapist, Aromatherapist and Reflexologist with my own practice in South Africa. I make a few Aromatherapy products and have been researching Bath Melts, and will be making these soon as i just love the idea of these instead of Bath Oil. They look so pretty as well. I am going to package them in Paper Cones with Cellophane ... Will let you know how they work out. Your site is so well done and easy to follow.
Hi Petra! What a lovely idea, I’m so happy that you like this DIY!
Packaging: If you plan to sell the bath creamers individually, I would package each in shrink wrap/film or plastic wrap/cling film. Your best option is heat shrink wrap. Moisture is the enemy of any bath product with baking soda, so make sure they are wrapped as airtight as possible.
Texture: I live in a moderate climate and they hold up quite well and don’t crumble. If you live in a hot, dry environment, you may have to increase the amounts of shea butter and cocoa butter slightly.
Shelf life: Made with a fresh ingredients, the bath creamers can be kept for a year. But check the best-before date of all ingredients and use the ingredient with the shortest shelf life as your guide.
I hope this helps and please let me know in case you another question! xx
I run a massage clinic, and would like to make these to sell.... could I store them all in one container, (Like a large decorative, yet air tight jar and sell individually (x$ per ball,) or do you recommend only storing them in jars. How stable are they as far as shelf life goes? Are they likely to crumble?
Absolutely gorgeous I love the idea of them, and am excited to make a batch!
Thank you, Stacy! I'm happy to hear you like the recipe. You can use bicarbonate of soda. As I understand it "baking soda" is the North American term for what we call "bicarbonate of soda" in the UK. Most of our readers are from North America, so I wrote "baking soda." Please let me in know in case you have another question and happy crafting!