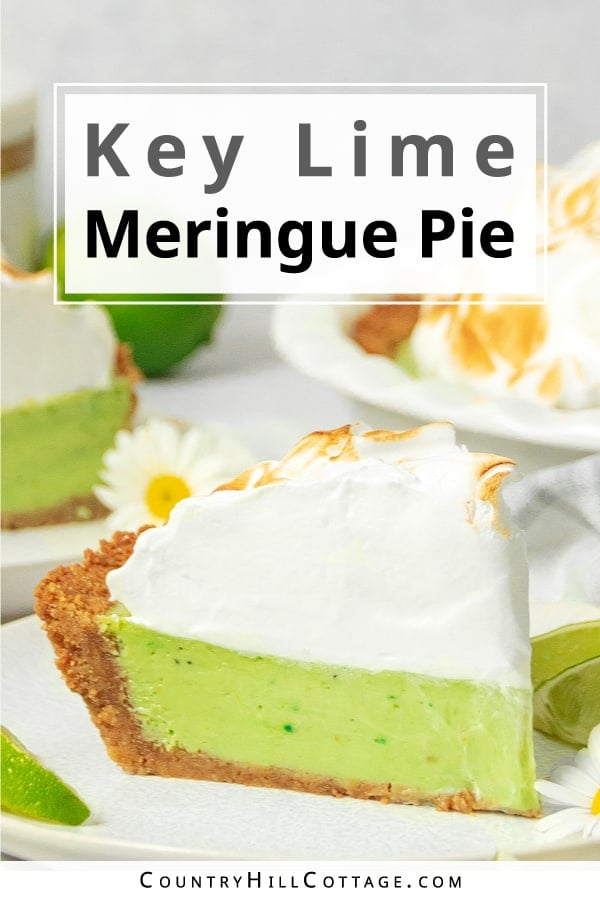
You’ll love this gorgeous homemade key lime meringue pie! With a crunchy graham cracker base, a creamy, zingy lime filling, and clouds of fluffy toasted Swiss meringue, it’s zesty, sweet, and impossible to resist!
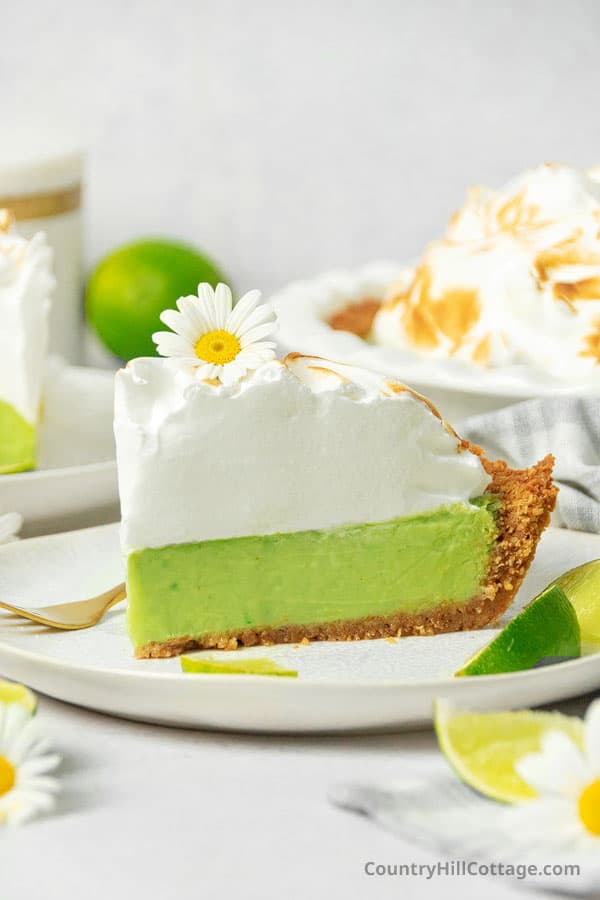
The best key lime pie with meringue
A popular dessert in the south, key lime meringue pie features a delicious graham cracker pie crust filled with a smooth, vibrant citrus filling.
Piled high with toasted meringue, it’s the perfect combination of tastes and textures, creamy, crunchy, sweet, and zesty!
My love for citrus pies runs deep. After sharing this delicious lemon meringue pie, I decided to give my classic key lime pie a makeover and create a homemade lime meringue pie.
If you’re looking for a show-stopping dessert, key lime pie with meringue topping is pretty hard to beat. It’s the perfect dessert for birthdays, celebrations, and holidays.
And despite the spectacular appearance, it’s actually surprisingly easy to assemble, so don’t feel intimidated. You’ll love it!
This is a fairly long post, full of step-by-step photos, helpful tips, and a troubleshooting guide to achieving the best pie every time.
To skip the tips and go straight to the recipe, hit the Jump-To-Recipe button at the top of the post or scroll down to the printable recipe card.
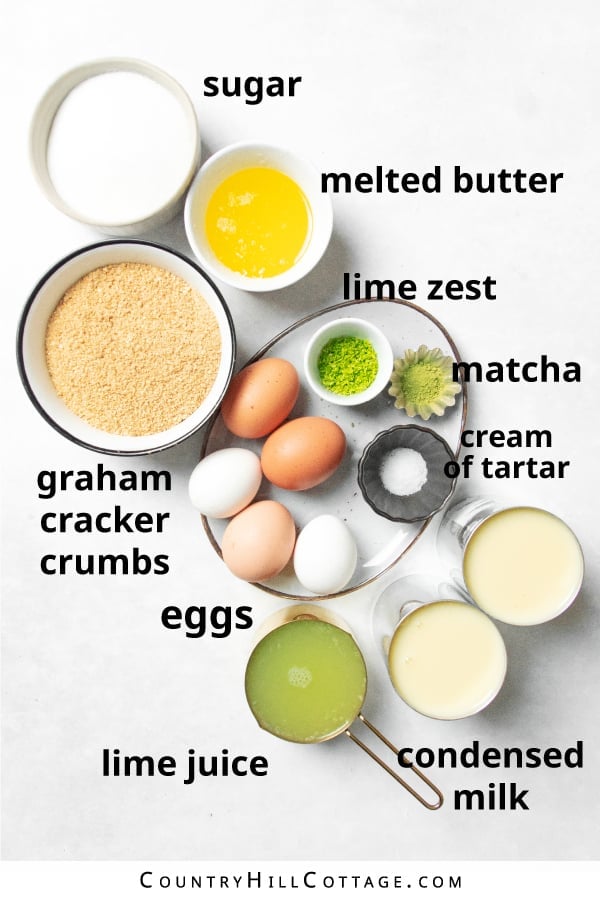
Ingredients
Between the crust, filling, and topping, key lime meringue pie uses only 8 simple ingredients. As long as you have limes, you may have everything you need to put it together. Please refer to the recipe card below for full ingredient quantities.
Graham cracker pie crust
- Graham cracker crumbs make up the base of the pie. Use premade crumbs for convenience, or crash a few sheets of graham crackers in your food processor or blender.
- Granulated sugar provides sweetness and stabilizes the crust.
- Melted butter binds the crumbs and sugar together, giving the pie crust a delicious buttery taste. I like salted butter, but unsalted is fine too.
Key lime filling
- Limes: I recommend key limes for their sweet-tart flavor, but regular Persian limes will work as well. If you don’t have the patience to squeeze out a bunch of tiny key limes, opt for bottled key lime juice. I highly recommend Nellie and Joe’s Key West lime juice, which you can find at any supermarket and online.
- Sweetened condensed milk is the creamy base of the lime filling. It adds richness and sweetness, as well as helping the filling set as it chills. Use full-fat condensed milk for the best results.
- Egg yolks help to thicken the key lime filling. You’ll need the yolks from 5 large eggs. Be sure to save the whites for the meringue topping.
- Matcha powder or green food coloring: You can use matcha or a touch of green food coloring to tint your lime filling green. I also use matcha in my key lime pie without condensed milk and love the effect.
Swiss meringue topping
- Egg whites are the base of the fluffy meringue. When separating the eggs, make sure that no trace of egg yolk gets into the egg whites. The yolk contains fat, and any fat hinders the egg whites from whipping properly.
- Granulated sugar gives sweetness and stability. The sugar is cooked with egg whites, pasteurizing the whites and melting the sugar.
- Cream of tartar helps to stabilize the meringue and prevents it from collapsing. Lemon or lime juice can also be used.
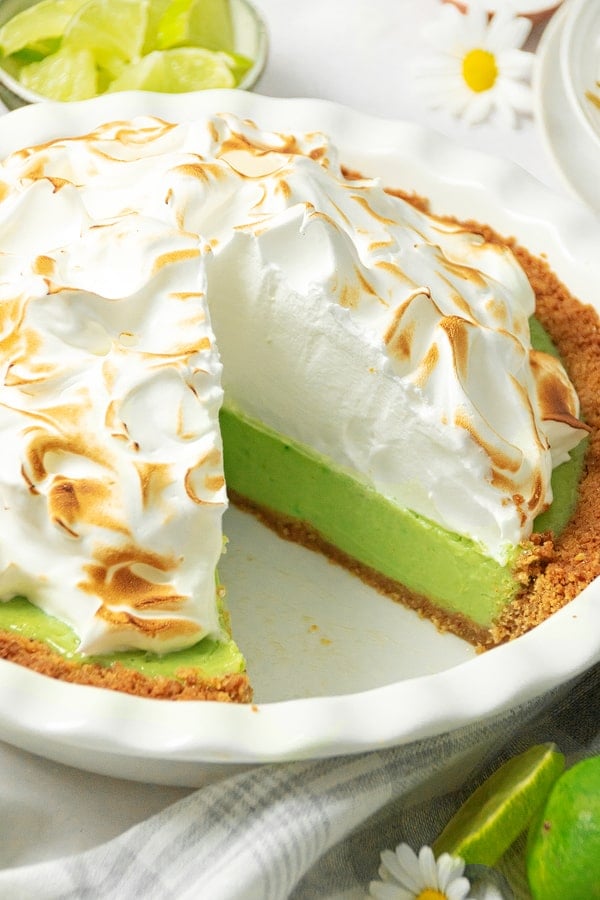
How to make key lime meringue pie
I know it looks like many steps, but key lime custard pie is pretty straightforward. Whip it up for your next get-together or party, and everyone will be impressed! There are 3 components to this treat:
- The graham cracker crust is made with 3 simple ingredients and pre-baked. Feel free to substitute a store-bought graham cracker pie shell if preferred.
- The key lime filling is mixed, poured into the crust, and then baked. After baking, the pie needs to chill for 6 hours or overnight.
- The meringue topping is made by heating egg whites and sugar in a water bath. Then beat the mixture until light and fluffy. Finally, toast the meringue with a kitchen torch to finish the pie beautifully.
#1: Make the pie crust
- Preheat oven. Preheat the oven to 350°F / 180°C / gas mark 4.
- Crush graham crackers. If using sheets, place them in a food processor or blender and blend until they resemble fine crumbs.
- Combine. Pour the graham cracker crumbs, sugar, and melted butter into a large mixing bowl. Stir with a spoon until the crumbs are evenly moistened.
- Fill pie pan. Transfer the mixture into a deep-dish 9-in / 23 cm pie pan. Press the crumb mixture tightly into the bottom and up the sides of the pie dish.
- Pre-bake the crust. Bake the pie crust for 8 minutes. Set aside, but leave the oven on.
#2: Prepare the key lime filling
- Mix the filling. While the crust is baking, prepare the filling by adding the condensed milk, lime juice, lime zest, egg yolks, and matcha powder (if using) to a large mixing bowl. Using a whisk or hand mixer, beat together until well combined, for about 2 minutes. Tap the bowl gently against the counter a few times to release air bubbles from the filling. Pour the mixture into the pre-baked pie crust.
- Bake. Bake the pie for 15 to 18 minutes. You want the pie set around the edges but still slightly jiggly in the center.
- Cool & refrigerate. Remove the pie from the oven and place it on a wire rack. Let sit at room temperature to cool completely. Once cooled, place the pie in the refrigerator to chill for at least 6 hours or overnight (and up to 2 days).
#3: Make the meringue topping
- Swiss meringue is a stable, easy-to-make type of meringue because the egg whites and sugar are cooked in a double boiler (a heat-resistant bowl set over a pot of boiling water).
- This leads to a soft, glossy meringue that tastes like marshmallow fluff and doesn’t need to be baked in the oven because the egg whites are pasteurized in the water bath.
- Set up a water bath. Place the egg whites and granulated sugar into a heat-proof bowl. Set the bowl over a saucepan filled with 1 inch / 2.5 cm of simmering water. Make sure the bowl doesn’t touch the water.
- Dissolve sugar. Whisk continuously and heat until the egg whites have thinned and the sugar has dissolved. The mixture should reach 160°F / 70°C on an instant-read thermometer. If not, continue cooking until the meringue mixture is warm enough.
- Whip until fluffy. Remove the meringue from the heat. Add the cream of tartar (or lemon/lime juice). Using a hand mixer, beat the meringue on high speed until white, fluffy, stiff, glossy peaks form for about 5 to 6 minutes.
#4: Toast the meringue
- Garnish. Add the meringue to the lime pie filling. Use a spoon or spatula to push the meringue all the way to the pie crust, building a dome in the middle. Use the back of a spoon to create some swirls and peaks for visual interest.
- Toast meringue. Brown the meringue with a hand-held kitchen torch to caramelize some of it and give it more definition. Alternatively, pop your pie under the broiler for 1 to 2 minutes, or until browned. Serve the pie right away.
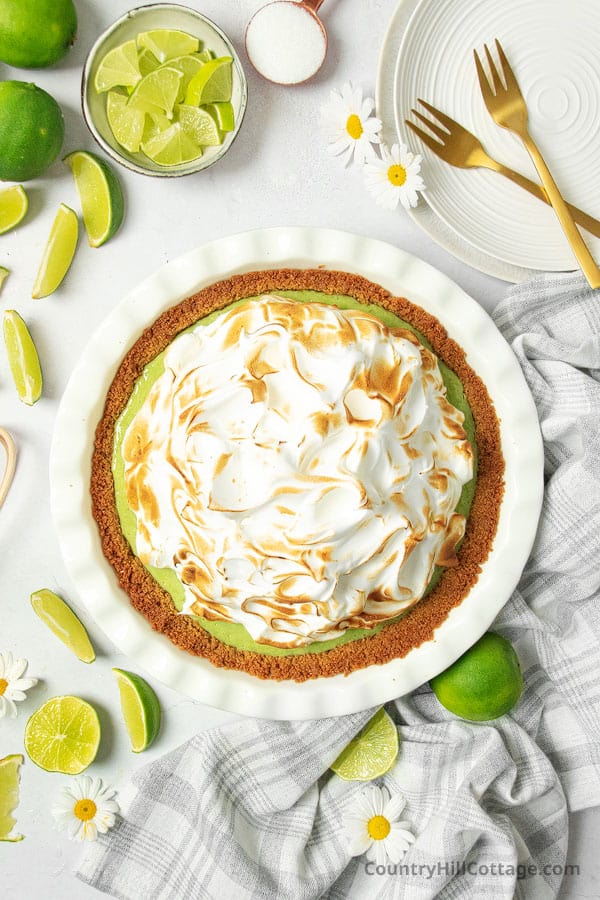
Baker’s tips
Here are a few of my favorite tips and tricks to get the perfect key lime meringue pie. It’s sure to impress your family and guests and make their stomachs happy!
7 tips for making the pie
- Pie pan size: You need a 9-inch / 23 cm pie plate. Both a regular or deep-dish pie pan will work.
- Pre-bake the pie crust: Pre-bake the crust before adding the lime filling to avoid a soggy, soft crust.
- Store-bought pie crust: Don’t have the time to make your own crust? Use a store-bought pie case.
- Stronger lime flavor: For a stronger lime flavor, add the zest of 3 to 4 key limes or 2 regular limes to the filling.
- Don’t skip the chilling time: Chilling the pie is imperative to cut clean slices. I recommend a minimum chill time of 4 to 6 hours. Overnight is even better if you have the time.
- Make–ahead: To save time on busy holidays, bake the pie crust and lime filling the night before and store in the fridge overnight. Then top with the meringue when you’re ready to serve the following day.
- Mini key lime pies: Follow the recipe, but press the graham cracker mixture into mini pie pans or a muffin pan. Reduce the blind-baking time to 5 minutes, and bake the mini pies for about 10 to 12 minutes after adding the filling.
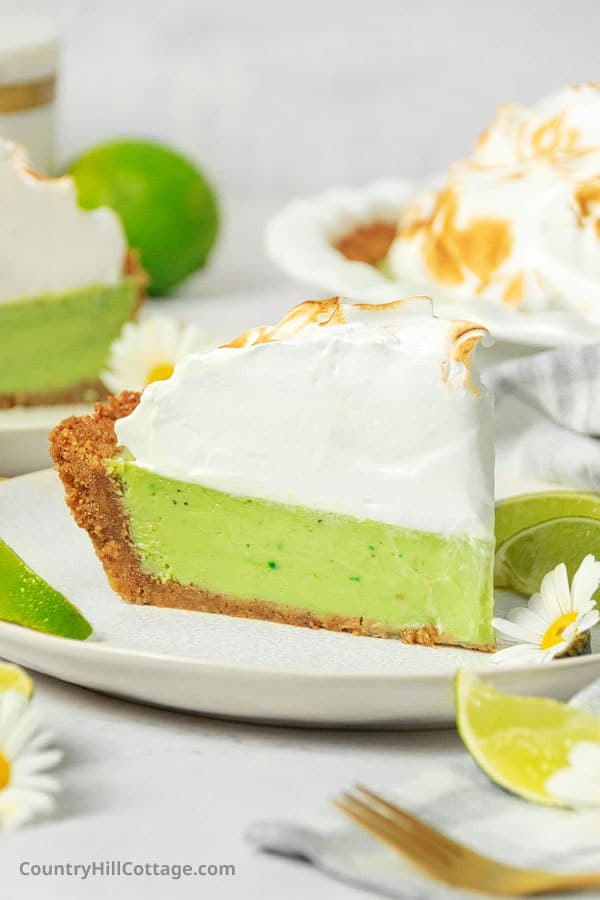
6 tips for making the perfect meringue topping
- Swiss meringue is a little more time-consuming than regular meringue, but still pretty simple to make and well worth the extra effort. The water bath ensures the egg whites are pasteurized without further baking. It also helps to stabilize the meringue and avoid weeping.
- Low humidity: Meringue turns out best on dry, low-humidity days.
- Separate the eggs one at a time and place each egg white into the mixing bowl to prevent contamination if a yolk breaks.
- Clean, dry equipment: Ensure your mixing bowl and beaters are dry and clean for perfectly fluffy meringue. Any residual fat/grease on your equipment can interfere with the egg whites and prevent stiff peaks.
- Add a stabilizing agent such as cream of tartar or lemon juice. Doing so helps to keep the meringue stiff and reduces the risk of weeping or leaking water.
- To stop the meringue from shrinking, spread it all the way to the edge and touching the crust. The meringue will hold onto the crust and not fall back.
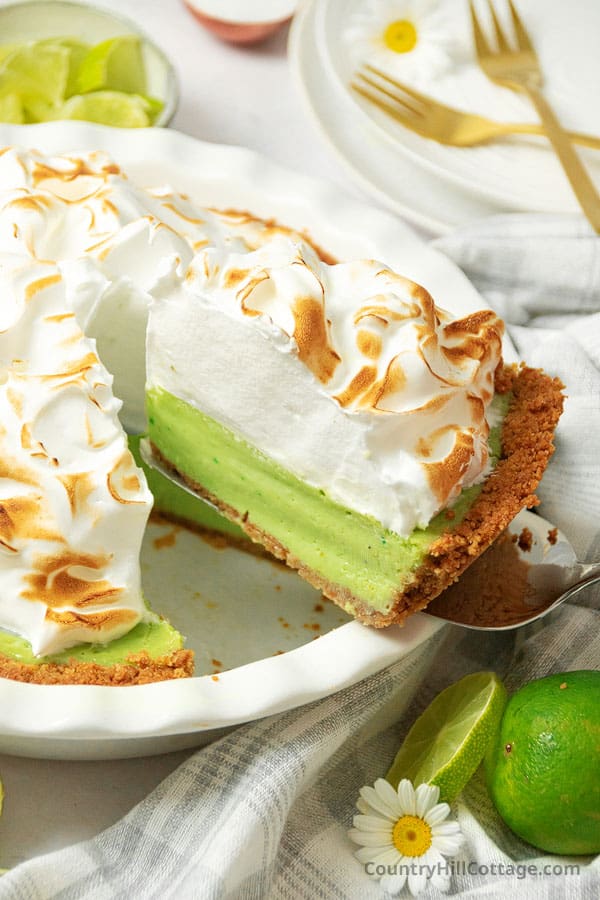
Troubleshooting
Why didn’t my key lime filling set?
There are 3 reasons why the lime filling may not be set enough to slice:
- Mismeasured ingredients: The filling relies on the acidity from the limes and the egg yolks to thicken. Too little lime juice or small egg yolks can prevent the mixture from setting. You can add an additional yolk if you have only small egg yolks.
- Underbaked: The pie wasn’t baked long enough for the filling to set. The filling should be set around the edges and have a Jello-like consistency in the center. If you shake the pie pan, you should see a slight wobble in the center.
- Short chilling time: The filling didn’t have enough time to set in the fridge. The pie needs 4 to 6 hours to fully firm up before slicing. Overnight is even better.
How do you stop key lime meringue pie from weeping?
Weeping refers to the layer of moisture that form between the meringue and filling after chilling. The liquid is just sugar syrup and doesn’t alter the taste, but no one wants a slice of watery pie.
My recipe uses Swiss meringue, which is more stable than regular meringue. You don’t have to worry about weeping as long as the lime filling doesn’t have any condensation when you add the meringue.
Baking can destabilize the meringue. That’s why I prefer toasting the top with a blowtorch.
You also want to seal the meringue completely to the edge of the pie, so it touches the graham cracker crust.
Undissolved sugar in the meringue can also cause weeping. So be sure to heat the egg whites and sugar in the water bath until the sugar has completely dissolved.

Storage instructions
How to store key lime pie with meringue recipe
Once the pie has cooled, place it into the refrigerator to set before serving. The pie tastes best within 1 to 2 days of making. However, you can store leftovers in an airtight container in the fridge for up to 3 days.
Can I make key lime meringue pie ahead of time?
Like all meringue pies, this one is best enjoyed fresh after applying the meringue. But you can easily prepare the components of the pie in advance, ready to assemble later.
Bake the crust and lime filling and store the baked pie in the fridge for 2 to 3 days before adding the meringue. When you are ready to eat, add the meringue topping, toast, and slice.
Can you freeze key lime pie with meringue?
Yes, both the baked graham cracker crust and lime pie filling can be frozen for up to 3 months. I recommend adding the meringue fresh on the day you want to serve the pie.
- Freeze: Let the baked pie cool to room temperature. Then place into an airtight container or wrap with several layers of plastic wrap and lay it flat in the freezer.
- Thaw: Leave the frozen pie in the fridge overnight. Top with freshly whipped meringue, torch, and serve.
Key Lime Meringue Pie Recipe
You'll love this gorgeous homemade key lime meringue pie! With a crunchy graham cracker base, a creamy, zingy lime filling, and clouds of fluffy toasted Swiss meringue, it's zesty, sweet, and impossible to resist!
Ingredients
Graham Cracker Crust
- 1 1/2 cups / 200 g / 7 oz graham cracker crumbs (approx. 11 full-sheet graham crackers)
- 1/4 cup / 50 g / 1.8 oz granulated (white) sugar
- 6 tbsp / 85 g / 3 oz butter, melted
Lime Filling
- 2 x 14-oz cans / 880 g sweetened condensed milk (full-fat)
- 1 cup / 240 ml / 8 fl oz fresh-squeezed key lime juice
- 5 large egg yolks (reserve the whites for the meringue)
- 1 tbsp grated key lime zest, packed (from 3 to 4 key limes)
- 1/2 tsp matcha powder (or a few drops green food coloring, optional)
Meringue Topping
- 5 large egg whites
- 1 cup / 200 g / 7 oz granulated sugar
- 1/2 tsp cream of tartar
Instructions
#1: Make the pie crust
- Preheat oven. Preheat the oven to 350°F / 180°C / gas mark 4.
- Crush graham crackers. If using sheets, place them in a food processor or blender and blend until they resemble fine crumbs.
- Combine. Pour the graham cracker crumbs, sugar, and melted butter into a large mixing bowl. Stir with a spoon until the crumbs are evenly moistened.
- Fill pie pan. Transfer the mixture into a deep-dish 9-in / 23 cm pie pan. Press the crumb mixture tightly into the bottom and up the sides of the pie dish.
- Pre-bake the crust. Bake the pie crust for 8 minutes. Set aside, but leave the oven on.
#2: Prepare the key lime filling
- Mix the filling. While the crust is baking, prepare the filling by adding the condensed milk, lime juice, lime zest, egg yolks, and matcha powder (if using) to a large mixing bowl. Using a whisk or hand mixer, beat together until well combined, for about 2minutes. Tap the bowl gently against the counter a few times to release air bubbles from the filling. Pour the mixture into the pre-baked pie crust.
- Bake. Bake the pie for 15 to 18 minutes. You want the pie set around the edges but still slightly jiggly in the center.
- Cool & refrigerate. Remove the pie from the oven and place it on a wire rack. Let sit at room temperature to cool completely. Once cooled, place the pie in the refrigerator to chill for at least 6 hours or overnight (and up to 2 days).
#3: Make the meringue topping
- Set up a water bath. Place the egg whites and granulated sugar into a heat-proof bowl. Set the bowl over a saucepan filled with 1 inch / 2.5 cm of simmering water. Make sure the bowl doesn't touch the water.
- Dissolve sugar. Whisk continuously and heat until the egg whites have thinned and the sugar has dissolved. The mixture should reach 160°F / 70°C on an instant-read thermometer. If not, continue cooking until the meringue mixture is warm enough.
- Whip until fluffy. Remove the meringue from the heat. Add the cream of tartar (or lemon/lime juice). Using a hand mixer, beat the meringue on high speed until white, fluffy, stiff, glossy peaks form for about 5 to 6 minutes.
#4: Toast the meringue
- Garnish. Add the meringue to the lime pie filling. Use a spoon or spatula to push the meringue all the way to the pie crust, building a dome in the middle. Use the back of a spoon to create some swirls and peaks for visual interest.
- Toast meringue. Brown the meringue with a hand-held kitchen torch to caramelize some of it and give it more definition. Alternatively, pop your pie under the broiler for 1 to 2minutes, or until browned. Serve the pie right away.
- Serve. Slice the pie into 10 to 12pieces, and enjoy!
- Store. Store leftover pie in the refrigerator and consume within 3 days.
Nutrition Information:
Yield: 10 Serving Size: 1Amount Per Serving: Calories: 562Total Fat: 20gSaturated Fat: 10gTrans Fat: 0gUnsaturated Fat: 8gCholesterol: 160mgSodium: 322mgCarbohydrates: 86gFiber: 1gSugar: 73gProtein: 14g
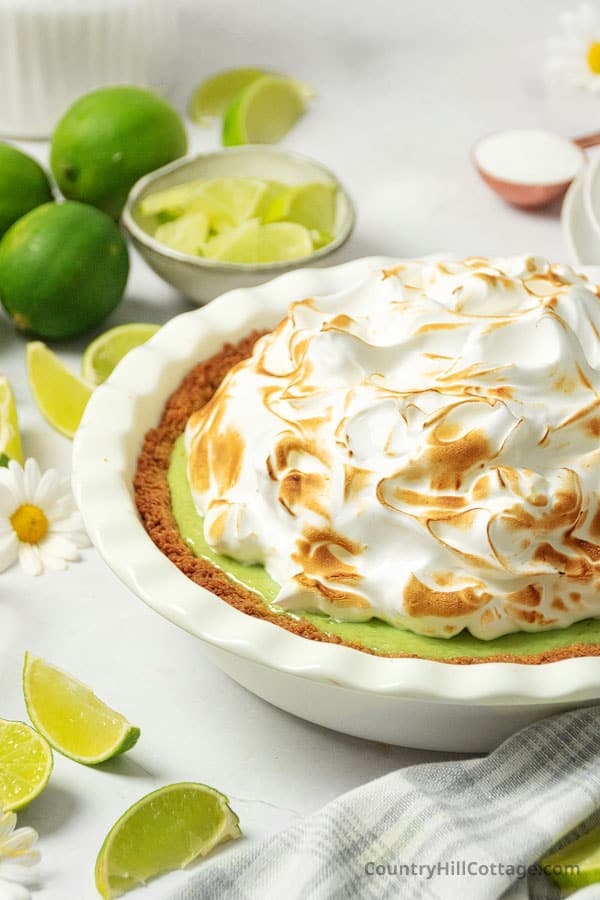
Reasons to love key lime meringue pie
- Easy ingredients: My recipe uses fresh key limes and a handful of basic pantry staples like sweetened condensed milk, eggs, and graham crackers.
- Simple to make: It’s an easy-to-follow recipe with step-by-step photos and helpful tips to help you achieve the best key lime meringue pie with condensed milk!
- Make-ahead dessert: Prepare the crust and filling the day before and top with the meringue when you’re ready to eat.
- Perfect for any occasion: Lime meringue pie is a fantastic, show-stopping dessert for holidays such as Easter, the 4th of July, Thanksgiving, family celebrations, or just because.
- Adaptable: You can prepare this recipe with another crust or switch up the limes for lemons or grapefruits.
- No weepy meringue: We’re making a Swiss meringue, which is a stable meringue that holds up well and won’t leak into your pie.
More homemade pies you’ll love
You can’t go wrong with a delicious homemade pie! They are the perfect end to any dinner and holiday meal. If you’re looking for more flavorful and easy-to-make recipes, here are a few more of my favorites!


