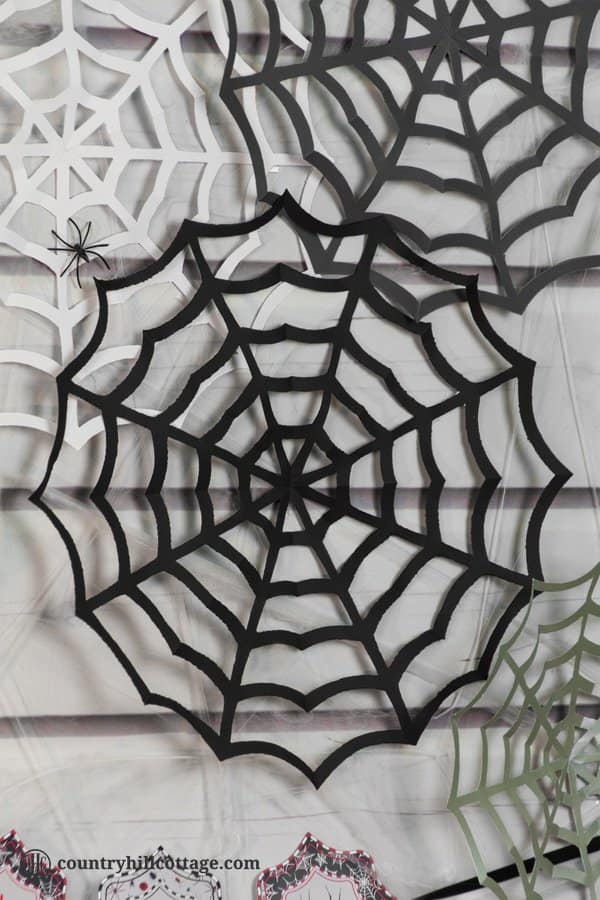
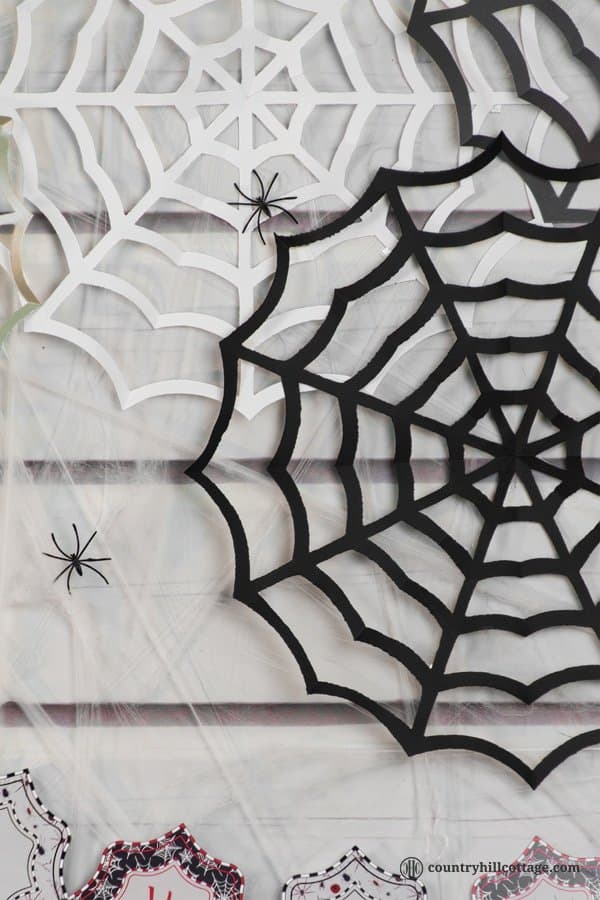
Today’s papercraft tutorial isn’t for the faint of heart. Paper spider webs add super spooky vibes to your home or classroom! DIY cobwebs look great as wall ornament, front door or window decoration, party décor and photo backdrop.


DIY paper spider webs
A DIY paper spider web is super easy and fun to make. All you need for this Halloween craft is paper, pencils, and craft scissors. I used black, silver and white paper for my spider nets, but other colors such as red, purple, or green, would look spooky, too.
This is a great DIY project to make with kids and an easy teacher Halloween craft for the classroom. You can make this DIY freehand, but I created a nifty printable template to make crafting a paper spider web even easier. Simply download the printable instructions and template at the end of the post!

Tips for hanging the paper spider webs
Apply a small piece of double-sided tape, glue dots, or adhesive sticks to the centre of a paper spider web and stick to a wall or surface. You may have to add a little more tape to support the top half of the spider web. I applied the spider webs in clusters and combined them with a printable garland from our Itsy Bitsy Spider Halloween bundle, cobwebs and small plastic spiders. You could also use a single paper spider web as a wall ornament and place it inside a black picture frame or to decorate your windows and front door.

More Halloween paper craft ideas
For more creepy paper craft ideas, check out our swarm of paper bats , giant two-toned paper flowers and Rose and the Raven wall art.


Paper Spider Web Instructions
Paper spider webs add super spooky vibes to your home or classroom! DIY cobwebs look great as wall ornament, front door or window decoration, party décor and photo backdrop. It’s best to use regular paper or thin cardstock to make a paper spider web. Since the paper is folded a few times, thick paper or cardstock. Very thin papers, such as crepe paper or tissue paper, are too fragile to support the delicate structure of the spider web.
Materials
- paper or thin cardstock in black, white, silver, and grey
- printable template (download below)
Tools
- bone folder (optional)
- black and white pencils
- craft scissors
Instructions
- Prepare the printable template. Print the template on thick cardstock or photo paper and cut away the grey areas. You now should have only the black spider net segment.
- Cut out paper squares. Use a pencil and ruler to mark and cut a square piece of paper. The template comes in three sizes. Cut a square piece of paper according the following dimensions:
Large spider net (ø 40 cm / 15.5 in) ➤ 42 cm x 42 cm / 16.5 in x 16.5 in paper square
Medium spider net (ø 30 cm / 12 in) ➤ 32 cm x 32 cm / 12.5 in x 12.5 in paper square
Small spider net (ø 20 cm / 8 in) ➤ 22 cm x 22 cm / 8.5 in x 8.5 in paper square - Fold the square paper. Fold the paper square lengthwise in half and in half again. Then fold the paper diagonally in half. You now should have a cone shape. Optionally, use the bone folder to go over the edges of the paper a couple of times to get flat, crisp folds.
- Transfer the template. Place the template on the paper cone, making sure the pointy end of the template lines up perfectly with the pointy end of the cone. Now trace around the template with a pencil to transfer the outline onto the paper triangle.
Tip: If you’re working with white and light-colored papers, use the black side of the template and a dark pencil. For black and dark-colored paper, use the white backside of the template and a white pencil. - Cut out the DIY paper spider web. Cut out the paper spider web following the outline and unfold the paper cone.
Free Printable Spider Web Template
Click on the button to download your free printable cobweb template and give your house a creepy makeover!


